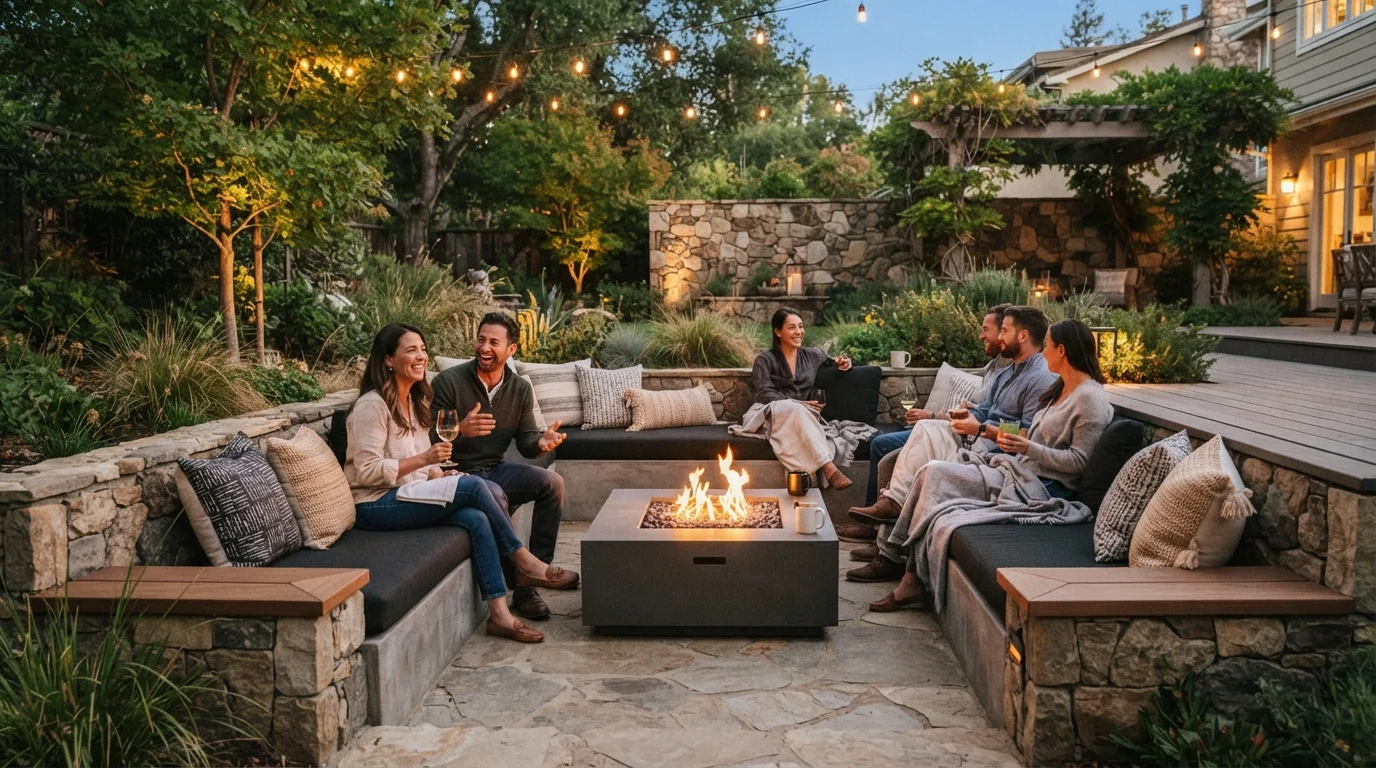
Imagine stepping into your backyard and sinking into a plush, sunken oasis where conversation flows as freely as the night air. That’s the magic of a cozy conversation pit backyard. Once a staple of mid-century modern design, these sunken seating areas are making a huge comeback. They transform flat yards into intimate, stylish retreats perfect for entertaining or quiet evenings under the stars.
In this guide, I’ll walk you through everything you need to know—from planning and digging to furnishing and lighting. Whether you’re a seasoned DIYer or hiring a pro, you’ll have a gorgeous new focal point for your outdoor living space.
Why Build a Sunken Conversation Pit?
A sunken pit naturally creates a sense of enclosure and intimacy. You’re literally “in” the conversation, not just sitting around it. This design lowers the visual profile of your seating, keeping your sightlines open to the garden or sky. It also acts as a natural windbreak. Compared to a standard patio, a pit feels more like a room—a cozy outdoor living room. For more ideas on blending indoor comfort with the outdoors, explore our resources on outdoor living design.
Planning Your Backyard Seating Area
Before you break ground, think about location. You want flat, well-drained ground away from large tree roots and underground utilities. Check your local building codes—pits over 12 inches deep often require permits or railings. Also, consider your view. A pit facing a garden wall or a fire feature feels more intimate than one staring at a fence. Sketch out the shape: round is classic, square is modern, and L-shapes work well in corners. For more layout inspiration, check out space planning guides for outdoor rooms.
Step-by-Step Construction Overview
Building a sunken fire pit seating area is a solid weekend project for two people. Here’s the basic flow:
- Mark and Dig: Outline your shape with spray paint. Dig 12-18 inches deep, sloping the sides slightly outward.
- Create a Base: Add 4 inches of crushed gravel for drainage, then tamp it flat.
- Build Walls: Use retaining wall blocks, poured concrete, or timber sleepers. Dry-stack blocks are easiest for DIY.
- Add Drainage: Install a French drain or perforated pipe if your soil is heavy clay.
- Finish the Edge: Cap with flat coping stones for a clean sitting surface.
For a detailed breakdown of materials and costs, refer to this quick comparison table:
| Material | Cost per sq ft | Difficulty | Durability |
|---|---|---|---|
| Retaining Wall Blocks | $8–$12 | Easy | High |
| Poured Concrete | $15–$25 | Hard (pro recommended) | Very High |
| Timber Sleepers | $6–$10 | Medium | Moderate |
| Brick Pavers | $10–$18 | Medium | High |
Want more garden structure ideas? Browse our garden design section for hardscape inspiration.
Choosing the Right Seating and Cushions
Comfort is king in a conversation pit. Go for deep, plush outdoor cushions that are at least 4 inches thick. Built-in bench seating with a slight recline works wonders. Add back support with tall pillows or a low backrest along the pit walls. For a softer vibe, scatter floor cushions and poufs. The key is to create a backyard lounge design that invites people to sink in and stay awhile. Waterproof, UV-resistant fabric is a must—look for Sunbrella or solution-dyed acrylic.
Lighting and Ambiance Essentials
A pit without good lighting feels like a hole at night. Layer your lighting: low-voltage LED strip lights under the lip of the pit for cozy glow, string lights overhead for magic, and a central fire pit for heat and light. Lanterns on the edge add a soft, movable touch. If your pit is near the house, dimmable sconces on the exterior wall work beautifully. Avoid harsh overhead floods—they kill the intimate mood you’re working so hard to create. For more outdoor room ideas, don’t miss the home design section.
Integrating a Fire Feature
A fire pit is the heart of any cozy pit. You can build a simple wood-burning bowl set in the center or go for a gas-fired table with lava rocks. Gas is cleaner and easier to control, but wood gives that crackling, nostalgic feel. Make sure your fire pit sits on a non-combustible surface (stone or metal) and is at least 10 feet from any structures. If you’re a fan of DIY backyard projects, a propane fire pit is one of the safest and simplest additions.
Frequently Asked Questions
How deep should a conversation pit be?
Most pits are 12 to 18 inches deep. Deeper than that feels like a hole; shallower loses the sunken effect. Measure from the surrounding ground to the top of your seat cushion.
Do I need a permit to build a sunken seating area?
It depends on your local codes. Pits deeper than 12 inches or with built-in seating often require a permit. Always call your local building department before digging.
What is the best shape for a conversation pit?
Round is most natural for conversation because everyone faces each other. Square works well with a fire pit in the center. L-shapes fit corners and create distinct lounging zones.
Can I build a pit on a slope?
Yes, but it’s more complex. You’ll need retaining walls on the downhill side to level the floor. Consider a terraced design where the pit sits on a flat cut into the slope.
How do I keep water out of the pit?
Proper drainage is essential. Dig a slight slope to one corner and install a French drain or gravel sump. Cover with a waterproof tarp when not in use for extra protection.
What plants work well around a conversation pit?
Low-growing evergreens like dwarf mondo grass, creeping thyme, or lavender. Avoid tall plants that block views. Place pots on the edge for easy care.
Is a fire pit safe for kids and pets?
Yes, with precautions. Use a mesh spark screen for wood fires, or choose a gas unit with a glass barrier. Always supervise and teach kids a “no-play zone” around the fire.
How much does a DIY conversation pit cost?
You can build a simple pit for $500–$1,500 using blocks and basic cushions. A larger, gas-integrated design with concrete walls runs $2,500–$5,000. Professional installations start around $6,000.
Final Touches and Styling Tips
Once the structure is done, bring in the texture. Outdoor rugs, throw blankets, and weather-resistant baskets for storing pillows make the space feel lived-in. Add a side table or two for drinks and books. Think about shade—a pergola or retractable awning keeps the sun off on hot afternoons. For a deeper dive into creating complete outdoor rooms, check out comprehensive guides on transforming your home and garden spaces.
One great resource for planning your entire backyard transformation is this comprehensive home and garden planning guide that covers everything from layout to plant selection for outdoor living areas.
Conclusion
A cozy conversation pit backyard is more than a seating area—it’s a destination. It invites people to unplug, connect, and enjoy the outdoors in comfort. Whether you dig it yourself or hire a contractor, the result is a timeless feature that adds real value to your home. Start planning today, and by next weekend, you could be toasting marshmallows from your very own sunken retreat.
Remember: the best outdoor spaces are the ones you actually use. Keep it comfortable, keep it intimate, and make it yours.