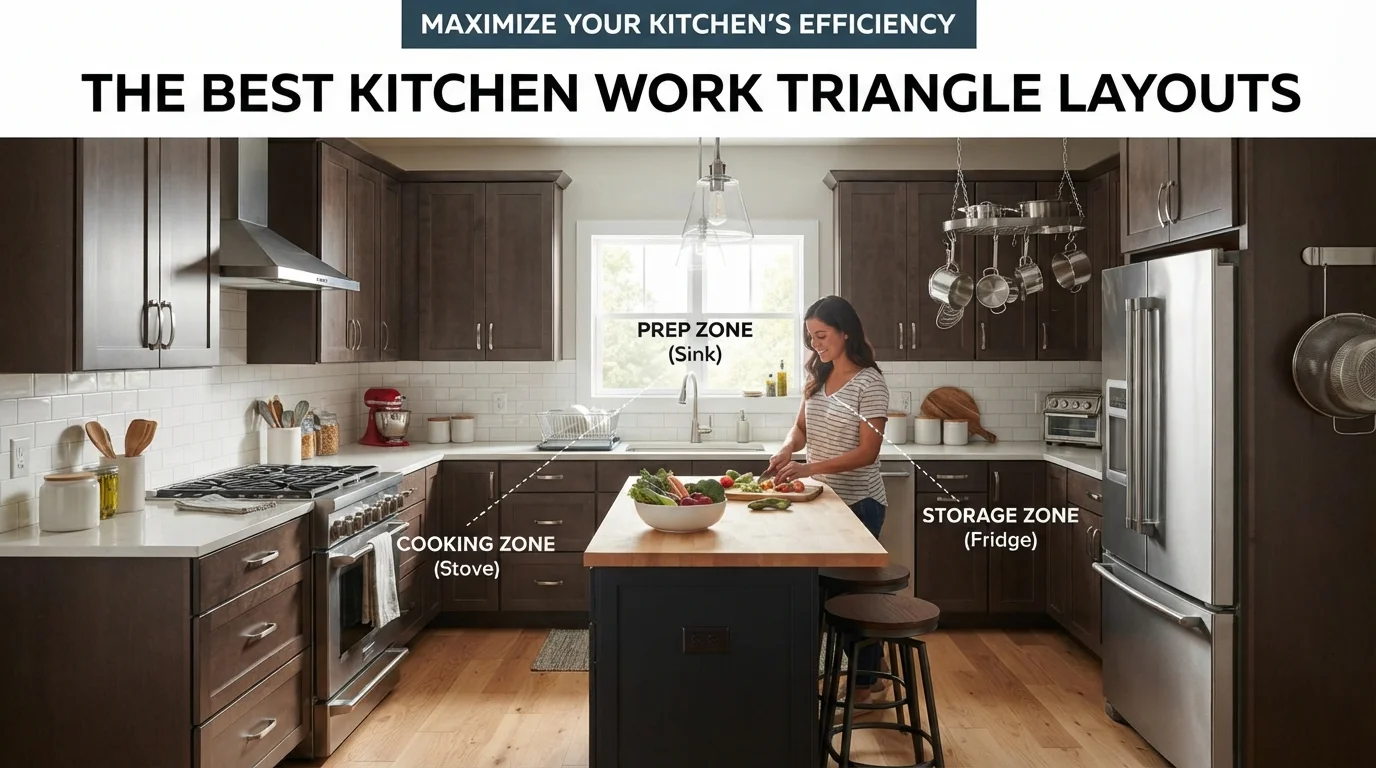
If you’ve ever felt like you’re running a marathon every time you cook a meal, your kitchen layout might be the culprit. The key to a smooth, efficient kitchen is something designers have relied on for decades: the work triangle. This concept connects your three main work zones—the sink, the stove, and the refrigerator—in a way that minimizes wasted steps. When done right, kitchen work triangle layouts transform chaotic cooking into a calm, logical flow.
In this guide, we’ll walk you through the most effective layouts for your kitchen, explain why the triangle matters, and show you how to adapt it to modern spaces. Whether you’re renovating or building from scratch, these insights will save you time and frustration. Let’s dive into the art of kitchen triangle design and discover what works best for your home.
Why the Kitchen Work Triangle Still Matters
The work triangle concept was developed in the 1940s to improve efficiency in small kitchens. It dictates that the distance between each of the three main stations—sink, stove, and fridge—should be neither too short (cramped) nor too long (tiring). The ideal total perimeter is between 12 and 26 feet, with each leg measuring 4 to 9 feet.
Modern kitchens have evolved, with islands and open plans adding complexity. Yet the principle remains solid: reducing traffic congestion and keeping prep, cook, and clean zones close at hand. Ignoring this can lead to awkward bottlenecks and unnecessary back-and-forth. For more guidance on efficient kitchen floor plan principles, check out our space planning guides.
The Classic Galley Layout: Narrow but Mighty
The galley kitchen is a straight shooter. With two parallel counters and a walkway in between, it naturally forms a compact triangle. The sink is typically on one wall, the stove on the other, and the fridge at one end. This arrangement allows you to pivot between stations with minimal steps.
It’s ideal for small apartments or vacation homes where space is tight. However, watch out for traffic flow—if the walkway is too narrow, two people can’t work comfortably. Aim for at least 36 inches of clearance. For small spaces, this is one of the most effective kitchen work triangle layouts you can choose.
The L-Shaped Layout: Flexible and Open
An L-shaped kitchen uses two adjoining walls to create a natural corner triangle. This design leaves the floor open, perfect for adding a dining table or small island. The sink often sits at the corner, with the stove and fridge on either leg.
Because there’s no through-traffic, it’s fantastic for single-cook households. You can also extend one leg to include a breakfast bar. Just make sure the triangle legs don’t exceed 9 feet—otherwise, you’ll stretch too far between stations. This layout works well with modern kitchen appliance placement strategies, keeping everything within arm’s reach.
The U-Shaped Layout: The Efficiency Powerhouse
With counters on three sides, the U-shaped kitchen offers the most balanced work triangle. The sink, stove, and fridge sit on different walls, forming a compact loop. This setup minimizes cross-traffic because the cook is essentially inside a dedicated zone.
It’s perfect for serious home chefs who need ample counter space and storage. The downside? It can feel closed off in smaller rooms. To keep it airy, use light colors and open shelving. If you’re redesigning, this is often the gold standard for kitchen triangle design that maximizes productivity.
The Island Layout: Modern and Social
Island kitchens are all the rage, but they require careful planning. An island can break the triangle if you place the sink or stove there. The classic approach is to keep the triangle—sink, stove, fridge—on the perimeter, and use the island for prep, seating, or a secondary sink.
This maintains kitchen traffic flow while adding a social hub. A common mistake is putting the cooktop on the island, which creates a dangerous heat zone near people. Instead, use the island for washing vegetables or casual dining. Pair this with our home design tips for a cohesive look.
Here’s a quick overview of how each layout stacks up:
| Layout Type | Best For | Triangle Efficiency | Common Pitfalls |
|---|---|---|---|
| Galley | Small spaces, minimal traffic | High | Narrow walkways |
| L-Shaped | Open plans, single cook | Medium-High | Long legs if oversized |
| U-Shaped | Serious cooks, large families | Very High | Can feel closed off |
| Island | Entertaining, open living | Medium | Heat zone conflict |
How to Adapt the Triangle for Open-Plan Spaces
Open-concept homes often blur the line between kitchen and living areas. Here, the work triangle needs to coexist with traffic from the dining room and hallway. The solution? Create a “working zone” that doesn’t interrupt the main flow.
Place the fridge near the entrance so family members can grab drinks without entering the cooking area. Keep the stove away from high-traffic paths to avoid collisions. If you have an island, orient it parallel to the counters for a streamlined look. For additional ideas, browse our blog posts on kitchen remodeling.
Mistakes to Avoid in Kitchen Work Triangle Layouts
Even the best plan can go wrong. Here are common errors designers see all the time:
- Too much distance: Each leg of the triangle should be 4 to 9 feet. Anything over starts to feel like a hike.
- Blocking the triangle: Never place a trash can, island, or table inside the triangle path.
- Ignoring landing zones: You need counter space next to the fridge, stove, and sink. Without it, you’ll juggle pots and plates.
- Forgetting multiple cooks: If two people cook, widen the walkways to at least 42 inches.
Steering clear of these mistakes will make your kitchen work triangle layouts truly functional. Planning your space carefully can also elevate other areas of your home—explore garden design principles for a cohesive property.
Frequently Asked Questions
What is the ideal distance between kitchen triangle points?
Each leg of the triangle should measure between 4 and 9 feet, with a total perimeter of 12 to 26 feet. This keeps movement efficient without feeling cramped.
Can I have a work triangle in a small kitchen?
Yes. In a galley layout, the triangle forms naturally along two walls. Just make sure the counters aren’t too close—at least 36 inches of walkway clearance is recommended.
Is the work triangle outdated for modern kitchens?
Not at all. While kitchens now include islands and multiple work zones, the triangle still provides a solid foundation for traffic flow and appliance placement.
What if my kitchen has an island?
Keep the triangle on the perimeter (sink, stove, fridge). Use the island for prep, seating, or a secondary sink. Avoid placing the cooktop on the island if it blocks traffic.
How do I fix a broken work triangle?
Reassess the placement of your appliances. Move the fridge or stove closer to the sink, or add a prep sink to create a secondary triangle. Sometimes a new countertop layout is all you need.
Does the work triangle apply to L-shaped kitchens?
Absolutely. The L-shape naturally creates a triangle along the two walls. Place the sink in the corner to keep the legs short, then position the stove and fridge on either side.
Where can I learn more about home layout trends?
Check out resources like this guide on modern home design for additional insights on blending style with function.
Conclusion
Great cooking starts with a great layout. By mastering kitchen work triangle layouts, you can reduce wasted steps, avoid traffic jams, and actually enjoy being in your kitchen. Whether you choose a galley for tight spaces or a U-shape for serious cooking, the principles are the same: keep it compact, keep it clear, and keep it functional.
Now that you know the fundamentals, take a look at your own kitchen. Measure the distances, identify bottlenecks, and plan a small change. You might be surprised at how much smoother your next meal prep feels. For more inspiration on creating efficient spaces, browse our outdoor living ideas and bring that same smart design outside.