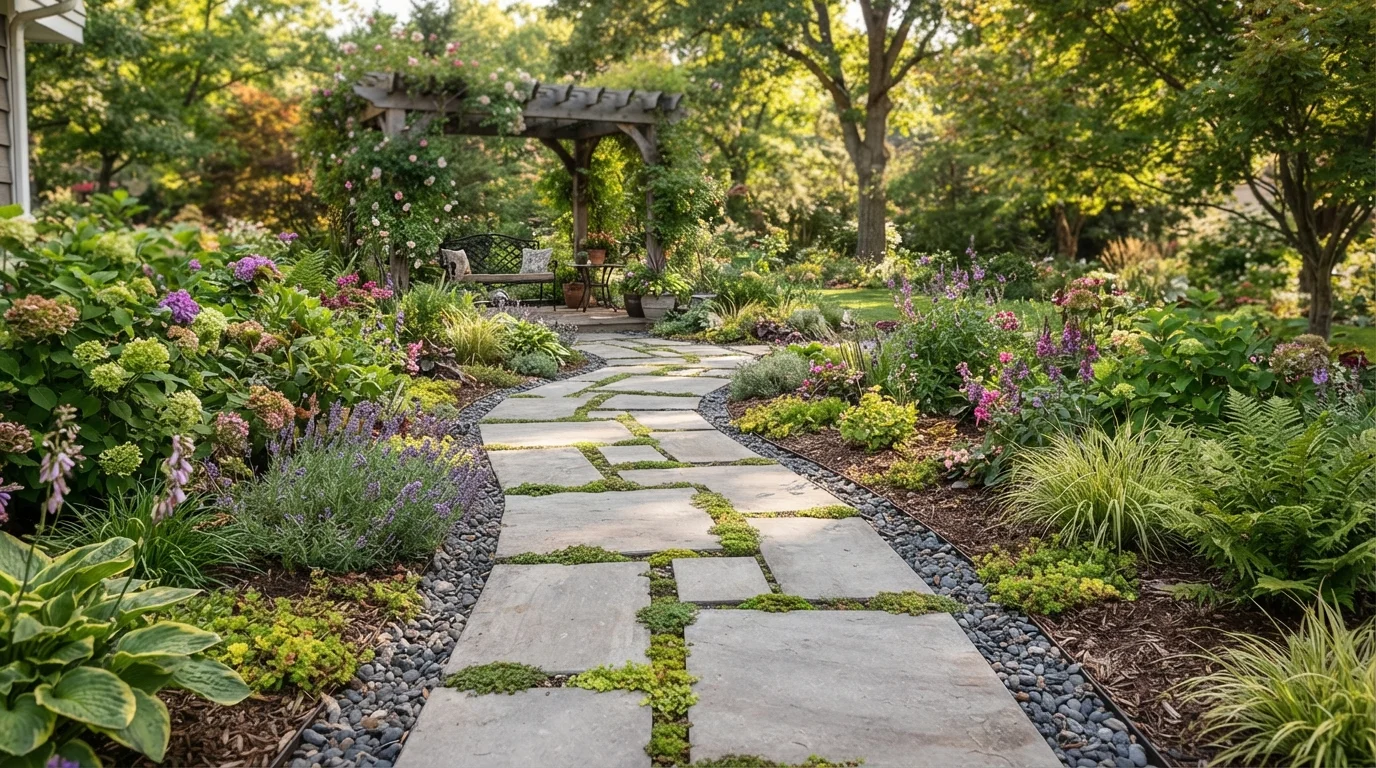
Have you ever walked through a garden and felt like something was missing? Usually, that missing link is a well-defined path. A garden pathway with concrete pavers does more than just guide footsteps—it adds structure, texture, and visual flow to your outdoor space. Whether you want a rustic stepping-stone look or a sleek modern lane, concrete pavers are versatile, durable, and totally DIY-friendly.
In this guide, I will walk you through everything from planning to the final sweeping. No confusing jargon—just straight talk and real-world tips from someone who has designed a ton of garden spaces. Ready to transform your backyard? Let’s get started.
Why Choose Concrete Pavers for Your Garden Path
Concrete pavers stand up to weather, foot traffic, and even occasional wheelbarrow loads. Unlike poured concrete, they won’t crack in a straight line. And if one paver gets stained, you simply lift it and swap it out.
They also come in endless shapes, colors, and textures. From cobblestone-inspired rounds to clean rectangular slabs, you can create a garden path design that matches your home’s style. Plus, the interlocking joints help with drainage after heavy rain.
Tools and Materials You’ll Need
Before you dig, gather these items. Working with concrete paver installation is much smoother when you have the right gear from the start.
- Concrete pavers (buy 10% extra for cuts and mistakes)
- Landscape fabric
- Crushed stone or gravel (base layer)
- Coarse sand (bedding layer)
- Rubber mallet
- Level (4-foot and torpedo)
- Tamper (hand or plate compactor)
- Edging stakes and plastic paver restraints
- Broom and polymeric sand
- Wet saw or angle grinder with a diamond blade
Planning Your Pathway Layout
A straight path feels formal and direct. A curving one invites exploration. Think about how you actually move through your garden. If you walk from the patio to the shed every morning, draw a line that saves steps but looks good.
Mark the edges with spray paint or garden hoses. And here is a pro tip: lay a few pavers on the ground before committing. Step back, snap a photo, and see if the proportions feel right. For more inspiration on how to fit your path into the bigger picture, browse some garden design ideas that balance hardscaping with plants.
Step-by-Step Guide to Laying the Pavers
Step 1: Excavate the Area
Dig down about 7 to 8 inches for a typical path. That depth allows for a compacted base, a sand layer, and the paver itself. Remove all grass, roots, and rocks. Slope the trench slightly (1/4 inch per foot) away from your house for drainage.
Step 2: Add and Compact the Base
Pour in 4 to 5 inches of crushed stone. Spread it evenly, then compact it with a tamper. A solid base prevents sinking and weeds. This is the most critical part of any successful garden pathway with concrete pavers.
Step 3: Install Edging and Landscape Fabric
Lay landscape fabric over the compacted base to stop weed growth. Then place plastic or metal edging along both sides. Secure it with stakes. The edging keeps pavers from shifting sideways over time.
Step 4: Spread the Sand Bedding
Add 1 inch of coarse sand on top of the fabric. Use two parallel pipes (like 1-inch PVC) as screed rails. Drag a straight board across them to level the sand perfectly. Do not wet or compact the sand before laying the pavers—it needs to stay soft for leveling later.
Step 5: Lay the Pavers
Start from one end and work your way forward. Place each paver gently on the sand bed. Press it down with the rubber mallet. Check level frequently. If a paver sits too high, lift it and remove a little sand. Too low? Add a small amount under it.
Leave a gap of about 1/8 inch between pavers for joint sand. Use spacers (or just your eye) to keep them consistent. For complex curves or corners, cut pavers with a wet saw (wear goggles and a mask).
A well-planned path can completely change how you use your yard. If you are also rethinking your overall property layout, take a look at space planning strategies that tie indoor and outdoor zones together.
Sealing the Joints and Finishing Touches
Once every paver is in place, sweep polymeric sand across the surface. This special sand fills the gaps and hardens when wet. Use a broom to push it deep into the joints, then mist the path with water (follow the bag instructions carefully).
Let the joint sand cure for 24 hours. After that, you can add lighting, border plants, or even furniture to make the path feel like part of your outdoor living area. A few low-voltage path lights make evening walks magical.
Design Variations and Creative Ideas
Concrete pavers don’t have to be boring. Mix sizes: use large square slabs with small rectangles in between. Alternate colors for a checkerboard effect. Or leave grass gaps between pavers for a “floating” step look—great for low-traffic garden spots.
You can also combine pavers with gravel or mulch for a softer feel. For more structured layouts, including the area around your home, check out relevant home design approaches that bridge architecture and landscape.
For additional authoritative guidance on hardscaping best practices, the National Association of Landscape Professionals offers research-backed installation standards for base preparation and material selection.
Cost Breakdown: How Much Will This DIY Project Cost?
| Material | Estimated Cost (per 50 sq ft) |
|---|---|
| Concrete pavers (basic) | $150 – $250 |
| Crushed stone base | $40 – $60 |
| Coarse sand | $15 – $25 |
| Polymeric sand | $25 – $35 |
| Edging and stakes | $30 – $50 |
| Landscape fabric | $10 – $20 |
| Total (DIY) | $270 – $440 |
Note: Prices vary by region. Professional installation would typically double or triple this budget.
Common Mistakes to Avoid
Do not skip the base compaction. Loose base equals wobbly pavers in a few months. Also, avoid using too much sand—stick to 1 inch max. Thicker sand shifts under weight. And never lay pavers directly on dirt; they’ll sink unevenly after the first rain.
One more thing: buy extra pavers from the same dye lot. Color batches vary. If you need to replace a paver later, you want it to match.
Frequently Asked Questions
1. Do I need to use polymeric sand?
Yes, if you want to prevent weeds and ants. Regular sand washes out quickly. Polymeric sand locks the joints tight and lasts for years.
2. Can I lay concrete pavers without a base?
Only for very temporary paths. For anything permanent, skip the base and you will likely see uneven settling and cracking within one season.
3. How long does a DIY paver path last?
With proper base and edging, 15 to 25 years. Occasional re-sanding and resetting a few pavers will extend the lifespan even further.
4. What is the best paver pattern for a garden?
Running bond (like brick) is simple and classic. Herringbone looks elegant but requires more cuts. Stacked bond (grid) is modern but shows uneven lines if not perfectly level.
5. How do I cut pavers for curves?
Use a wet saw with a diamond blade for straight cuts. For curved cuts, score the line with an angle grinder and tap the paver with a chisel and hammer.
6. Should I seal the pavers themselves?
Sealing protects against stains and moss, especially in shady gardens. Use a breathable sealer designed for concrete. Reapply every 2–3 years.
7. Can I plant flowers between the pavers?
Absolutely. Choose low-growing, drought-tolerant plants like creeping thyme or Irish moss. Leave wider gaps (1–2 inches) for soil and root space.
8. How do I clean the path later?
A stiff broom and hose water handle most dirt. For stubborn stains, use diluted white vinegar or a pressure washer on low setting.
Conclusion
Building a garden pathway with concrete pavers is one of the most rewarding weekend projects you can tackle. It boosts curb appeal, makes your garden more functional, and gives you that satisfying “I built this” feeling every time you walk it.
Start small—maybe a straight run from the gate to the front door. Learn the technique, then expand. Before long, you will have a network of beautiful, lasting paths that tie your entire outdoor space together.
For more project ideas and step-by-step tutorials, explore other topics on the blog. There is always something new to build.