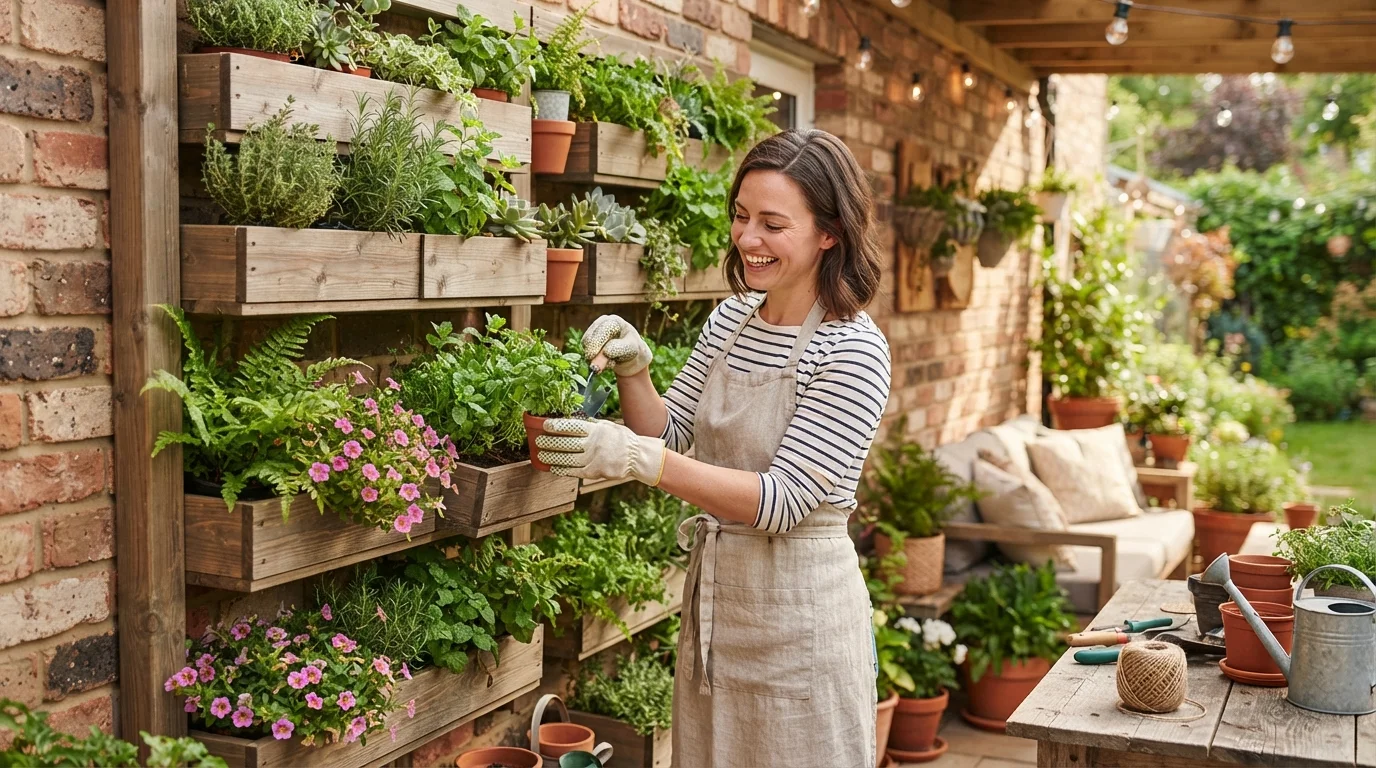
Imagine stepping into your backyard or balcony and seeing a lush, living tapestry of greens and blooms climbing up your wall. That dream is closer than you think — in fact, you can make it happen this weekend.
A vertical garden isn’t just a stunning visual statement; it saves ground space, improves air quality, and can even insulate your home. Whether you have a sprawling patio or a tiny apartment balcony, building your own vertical garden is a rewarding and doable project that packs a huge aesthetic punch.
I’ve spent the last 15 years designing outdoor spaces, and this weekend-friendly project is one of my favorites. Grab your tools, put on some music, and let’s turn that blank wall into something incredible.
Choose Your Vertical Garden System
Before you start hammering, you need to decide on the structure of your living wall. The right system depends on your budget, wall type, and how handy you feel with a drill.
There are three main routes you can take. Each one is totally achievable in a single weekend, but they have different levels of complexity.
- Pre-made modular panels: These are plastic or felt pockets that you mount on a frame. Fast and foolproof, but a bit pricier.
- Wooden planter boxes: Build or buy a set of narrow boxes that stack or attach directly to a wall. Rustic and versatile.
- DIY felt or fabric pocket system: The most budget-friendly. You stitch or staple heavy-duty fabric with pockets onto a wooden frame. Great for herbs and small foliage.
For this guide, we’ll focus on the wooden planter box method — it looks structurally solid, supports more plant varieties, and requires only basic carpentry skills. You’ll also find plenty of inspiration and practical tips in our garden design archives to refine your final look.
Gather Your Materials and Tools
The secret to finishing in a weekend is preparation. Start Friday evening by gathering everything you need. Here’s your shopping and toolbox checklist.
| Materials | Tools |
|---|---|
| Pressure-treated lumber (cedar or pine) | Circular saw or hand saw |
| Landscape fabric (to line the boxes) | Drill with screwdriver bits |
| Outdoor wood screws (2.5 and 3 inches) | Staple gun |
| Waterproof sealant or stain | Level and measuring tape |
| Drip tray or gutter underneath | Safety goggles and gloves |
| Potting mix and slow-release fertilizer | Painter’s brush or roller |
| Your chosen plants (12–15 per 4 sq. ft.) | Ladder or step stool |
Don’t skip the landscape fabric or the waterproof sealant. Moisture is the number one enemy of a vertical garden, and these two items will keep your wall dry and your wood rot-free for years.
Build the Frame and Planters
This is where the magic happens. Cut your lumber into four boxes — each about 3 feet long, 6 inches deep, and 5 inches tall. Why multiple small boxes instead of one giant trough? They’re easier to mount, easier to water evenly, and look much cleaner on the wall.
Assemble each box by screwing the short sides into the long sides. Staple landscape fabric inside the boxes to hold the soil, leaving a half-inch gap from the top edge. Then apply a coat of waterproof sealant on all exterior surfaces.
While the sealant dries (about 2 hours), mark your wall. Space the boxes vertically with 4 to 6 inches of room between them for plant growth. Use a level — seriously, a crooked DIY plant wall drives the design eye crazy.
If you’re attaching this to a fence or a rental wall, consider building a freestanding frame first. For a solid interior or exterior wall, use heavy-duty expansion anchors. Our guide on outdoor living design solutions is full of installation tips for tricky wall types.
Select and Arrange Your Plants
Now comes the fun part — shopping for greenery. For a dramatic, low-maintenance vertical garden, combine texture and color. Stick with plants that share similar water and light needs.
Here are some of my go-to picks for a thriving compact garden on a wall:
- Spider plants and pothos for trailing greenery that softens the edges of your boxes.
- Ferns (like Boston or maidenhair) for that lush, forest-floor feel.
- Succulents like sedums and echeverias — perfect for sunny, low-water corners.
- Herbs like basil, mint, and thyme — practical and fragrant.
- Annual flowers like petunias or impatiens for a pop of color.
If you want a more curated look, start with a “thriller, filler, spiller” approach: one dramatic tall plant, a few bushy fillers, and a trailing vine that hangs over the box edge. This same principle works beautifully in other home design vertical features.
Mount, Plant, and Water
Attach your bottom box first. Screw it securely into the wall studs or anchors. Then mount the second box, and so on. This is a two-person job — one holds the box in place, the other screws. Trust me, I’ve tried doing it solo, and it ends with a bruised toe and a slightly crooked planter.
Fill each box with damp potting mix mixed with slow-release fertilizer. Plant your selections, starting from the back and moving forward. Pack the soil gently around each root ball. Water each box thoroughly right after planting — this settles the soil and eliminates air pockets.
For watering, you have two options: hand-water every few days with a gentle spray nozzle, or install a simple drip irrigation line along the top box that drips down through each level. For more advice on organizing and irrigating tight spaces, check out our space planning resources.
If you’re looking for a professional-quality master plan for your entire home landscape, many homeowners also benefit from a complete home and garden design guide that covers layouts, plant selection, and advanced irrigation setups.
Maintenance: Keep It Thriving
A vertical garden is a living piece of art, not a one-and-done decoration. The good news? It’s low-effort once established.
Check the soil moisture every two days by sticking your finger an inch deep. If it feels dry, water deeply. Feed your plants with a diluted liquid fertilizer once a month during the growing season. Trim dead or yellowing leaves to keep it looking sharp.
Rotate your plants occasionally if one side seems to be stretching toward the light. And don’t panic if you lose a plant here and there — replace it with something new, and your wall keeps evolving.
Frequently Asked Questions
Do I need a sunny wall for a vertical garden?
Not at all. While most flowering plants and herbs love full sun (6+ hours), ferns, pothos, and many foliage plants thrive in partial shade or indirect light. Match your plants to your wall’s exposure.
Will a vertical garden damage my wall?
If you build a freestanding frame or use proper waterproofing and drainage, the wall stays dry. Using a drip tray beneath the bottom box and sealing the wood creates a moisture barrier that protects your property.
How much does a DIY vertical garden cost?
A weekend project like the one in this guide runs between $80 and $150 for lumber, fabric, screws, and sealant. Plants add another $40 to $80. Compare that to $400+ for a pre-made system.
Can I build a vertical garden in a rental apartment?
Absolutely. Build a freestanding frame that leans against the wall or sits on a balcony railing. No holes, no damage, and you can take the whole thing with you when you move.
What’s the best watering schedule for a living wall?
In hot weather, water every two days. In cooler months, once a week is usually enough. The best method is to water slowly until you see water trickling from the bottom of the lowest box — that ensures all roots get wet.
Do vertical gardens attract pests?
Any garden can attract bugs, but healthy plants are naturally resistant. Inspect leaves weekly, hose off aphids if you spot them, and avoid overwatering (which invites fungus gnats). Neem oil spray is a safe, effective preventive.
Can I grow vegetables in a vertical garden?
Yes! Leafy greens like lettuce, spinach, and kale grow beautifully in shallow boxes. Strawberries, cherry tomatoes (dwarf varieties), and herbs are also fantastic for vertical garden design on a food-producing wall.
Final Thoughts
Building a vertical garden in a single weekend isn’t just a project — it’s a transformation. You turn wasted wall space into a breathing, growing sanctuary that changes with every season. And the best part? You did it yourself, with your hands and a few basic tools.
If you want even more ideas on how to layer textures, choose the right hardscape, or design a full outdoor room, check out the full blog archive here on Sansouka. I share new projects, plant combos, and expert tips every week to help you create a home garden that truly feels like yours.
Now go out there, get your hands dirty, and build something incredible. Your weekend project is waiting.